
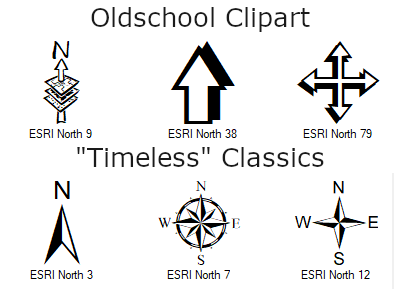
By far the easiest way to tell if someone used ArcMap to create their map is by looking at the north arrow. The first version of ArcMap, 8.0, was released at the end of 1999, and most of the software’s included north arrows reflect the clipart-y style of that era, with some of the worst offenders pictured below. Luckily, almost all cartographers are well-aware of this fact, though this means that most default to the handful of “timeless” north arrows shown in the second row of the image — the odds are good that you’ve seen these in the wild. One of the simplest ways to boost the creativity and appeal of your map is to add a custom north arrow (or consider removing the north arrow completely if you don’t want to read the rest of this article).
Once you’ve drawn your own or found an image that you have permission to use, you can go ahead and add it to your map as long as it’s in a supported format, either .jpg, .png, .gif, .emf, or .bmp. Adding your own north arrows to ArcMap can either be as simple as importing an image, assuming your map is oriented with north at the top, or a little more complex by adding a custom style, a necessity if you plan on using your custom arrow in multiple maps. For the former method, open your map in layout view, then click Insert > Picture — you can probably figure out the rest.
For the latter method, you can create a custom style by clicking on Customize > Style Manager, which displays the window below. If you will be the only one using this style, by default you already have a “personal style”, shown as the first folder in the catalog tree on the left pane of the Style Manager. One benefit of using your “personal style” is that these north arrows will display even before Esri\’s defaults next time you add one to your map.
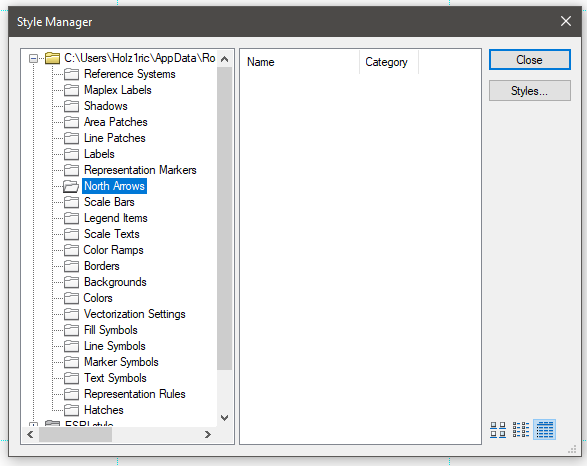
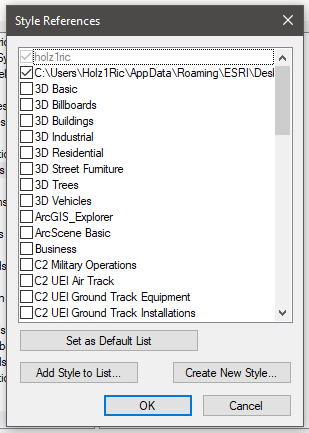
If you intend on sharing this style with others, create a new style by clicking on the \”Styles…\” button in the Style Manager and the \”Create New Style…\” button on the following dialogue box. Specify the folder path and file name, and your new style will now appear in the Style Manager!
Once you\’ve identified the style file you want to save your north arrows to (either your personal file or a custom style you created), use the Style Manager to navigate to the folder named \”North Arrows\” within that style file and double click (look at the screenshot of the Style Manager above for a visual). The pane on the right side should be completely empty. Right click, then click New > North Arrow, and the dialogue box picture below pops up.
Click the “Symbol…” button, then prepare for the familiar nightmare of endless dialogue boxes that ensues when editing a symbol in ArcMap. In the Symbol Selector dialogue, click the “Edit Symbol…” button and the Symbol Property Editor dialogue pops up. Under properties, change the type to Picture Marker Symbol, then select the image you wish to use as your north arrow (it must be a .jpg, .png, .emf, .bmp, or .gif image). You’ll likely have to modify the size, otherwise the result will be tiny and illegible. After your adjustments, save all the changes by clicking OK on all of the dialogue boxes. Back in the Style Manager, rename your north arrow to whatever you wish. Now you’ll be able to find this arrow next time you add a north arrow in the map layout via Insert > North Arrow!
Whether you prefer the intricate compass designs of old seafaring maps or a modern, minimalist style or if you simply want to use an existing style but change the font of the “N” or “North” to match the font used elsewhere in the map, north arrows offer major room for improvement on your maps. What will you create?